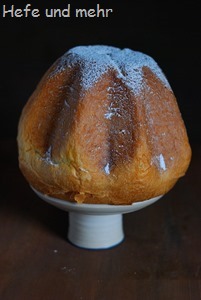
The quite days between christmas and new years eve I like to spent with baking time consuming “cake”-breads. My favourite one is the golden Pandoro, who is a laborious with its preferments, but every time I’m so excited how high it rise and what flavour it develops.
This year I baked once again my pure Sourdough variant, which gains it strangth and complex aroma through the sweet starter. It needs more then 24 hours until it is done, but when the tender crumbs nearly melts in my mouth I always think: This feels like eating a cloud.
When I was baking the pandoro this year there was a question about the sweet starter: Does it really rise during fermentation? I looked at my starter who had trippled its volume in 2 hours and decided to snap a photo to show how it should look. And as I was taking photos I decided to follow the whole fermenting and proofing process with the camera. When the pandoro was baked and sat in the kitchen to cool, I checked the pictures on the computer and was very happy with my result. The pictures showed so well how the preferment dobuled, nearly trippled and how the Pandoro gained a nearly the a four times bigger volume during proofing and baking.
Pandoro
yields a big Pandoro of 650g and a small one of 400g
First dough
- 100g flour Type 550
- 35g Water
- 60g Egg
- 25g sugar
- 150g Sweet Starter, 4 hours after the last feeding
Second dough
- 60 g flour Type 550
- 25 g Egg
- 12 g sugar
- 3 g soft Butter
- all of the first dough
dough
- all of the second dough
- 250g flour Type 550
- 5g Salt
- seeds of 1/2 vanilla bean
- 30g Butter
- 160g Egg
- 110 g sugar
Tourage
- 150g Butter
First dough: Mix all ingredients to form a homogenous dough. Ferment for 2 hours at 30°C.
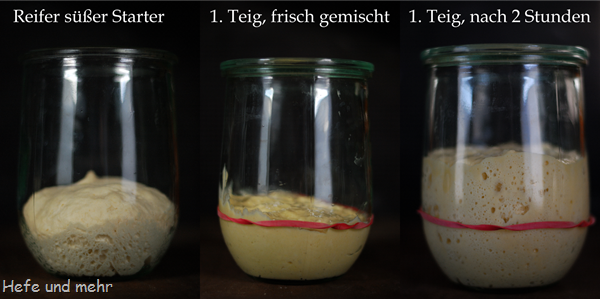
Second dough: Mix first dough with the other ingredients for the third dough and ferment it for 3 hours at 30°C.
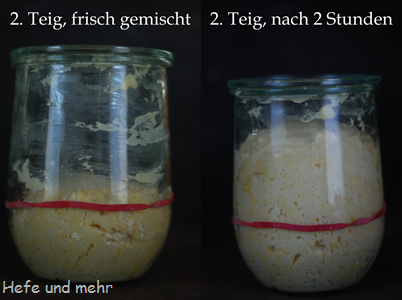
Final dough: In a stand mixer mix the third dough with flour, salt and 86g egg and knead for 5 min at slow speed. The dough is very stiff at this time.
Now add 30g sugar and mix on slow speed for one minute.
Add 20g egg and mix in slow speed for one minute.
Add 20g sugar and continue mixing for one minute.
Add now egg and sugar like before until all sugar and egg is incorporated.
Continue mixing on medium speed until full gluten development (about 10 min).
Ferment for 1 hours, then transfer the dough into the fridge for one hour.
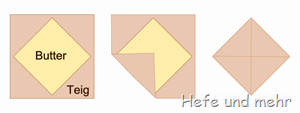 Now take the butter out of the fridge, flour it well and pat it with your rolling pin into a square of 17 cm lenght. Roll the dough into a squere with 26 cm length. Place the butter in the middle and fold the dough over like an evelope (see picture). Roll the dough into a band of 20 cm x 60 cm .
Fold the dough in thirds like a letter (single fold)and cool in the fridge for at 20-30 min, then roll it again into a band of 20 cm x 60 cm and repead the folding, resting and rolling for another two times.
Grease the pandoro pans.
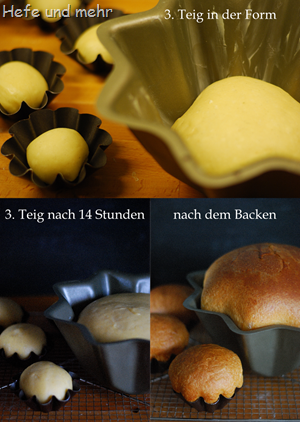 Divide the dough it into a pieces of 650 g and 400g . Shape the dough into tight balls (without kneading!). Place the balls, seam side down, in the pans and proof for 12 – 20 hours until it reach the top of the pan (Proofing time depends on room temperature and strength of the starter).
Bake at 160°C for 45 min with steam.
Tips
- For weighting the eggs mix 5 eggs in the beginning and then weighting the amount of eggs needed from this mixture
- To prevent the third dough getting to warm, place eggs and flour in the fridge while proving the second dough
- My Pandoro-Form is from Staedter. Don’t ask me why they call this a panettone form!
- To speed up the final proof, you can put the pandoros to 26°C (for example your oven, with lights turned on)
Deutsch


No Responses t_on Pandoro – A Picture Story